Table of Contents
- Based on the Liberated Pixel Cup
- Palette
- Grid Size
- Perspective
- Lighting, colors, and shading
- Standard Avatars
Based on the Liberated Pixel Cup
Portions of this guide come directly from the Liberated Pixel Cup's original style guide, as well as Eliza Wyatt's LPC Revised project, with some modifications for our purposes.
Palette
Although full color support is offered, official assets make use of the Liberated Palette by Eliza Wyatt.
Palette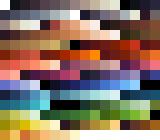

Ramps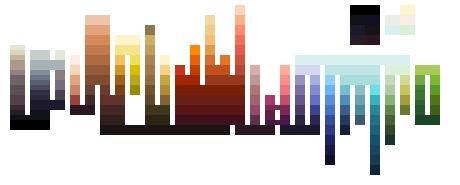
Demo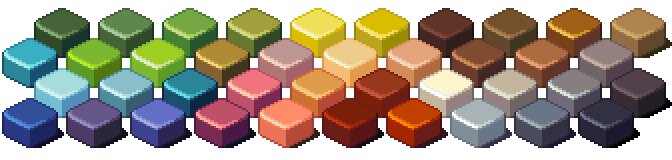
Outlines
Avatars use a strong outline to help them stand out from the background. Most objects will utilize a softer outline, with a color that is only slightly darker than its base color. Occasionally, there may be exceptions that use no outline at all, though this mostly comes up with very tiny items.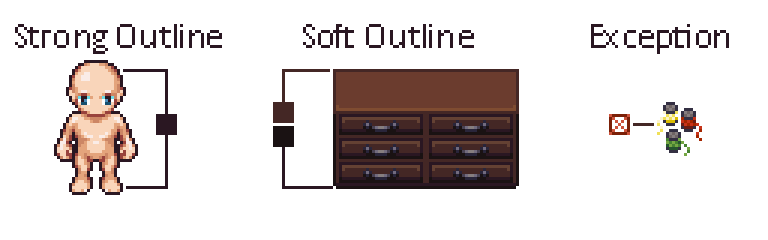
Material Guide - Glass
Material Guide - Metal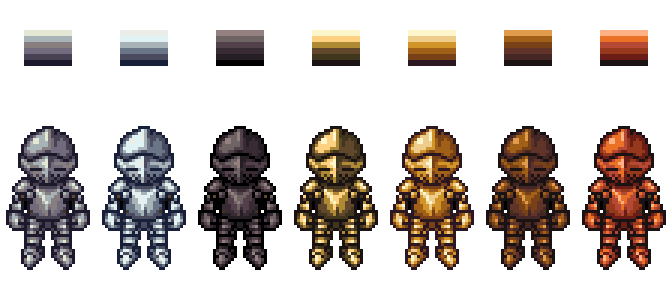
Material Guide - Stone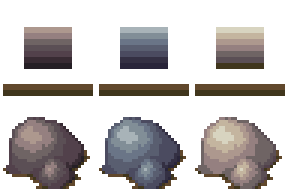
Material Guide - Wood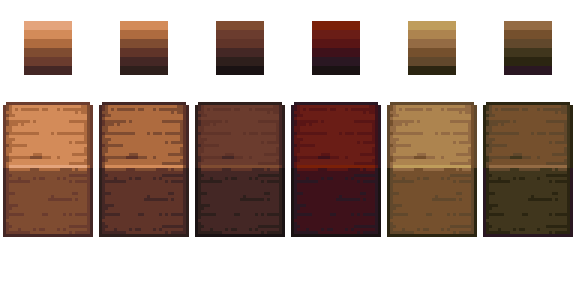
Material Guide - Plants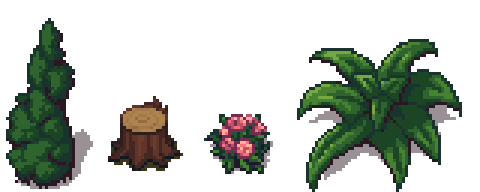
Official skin & clothing ramps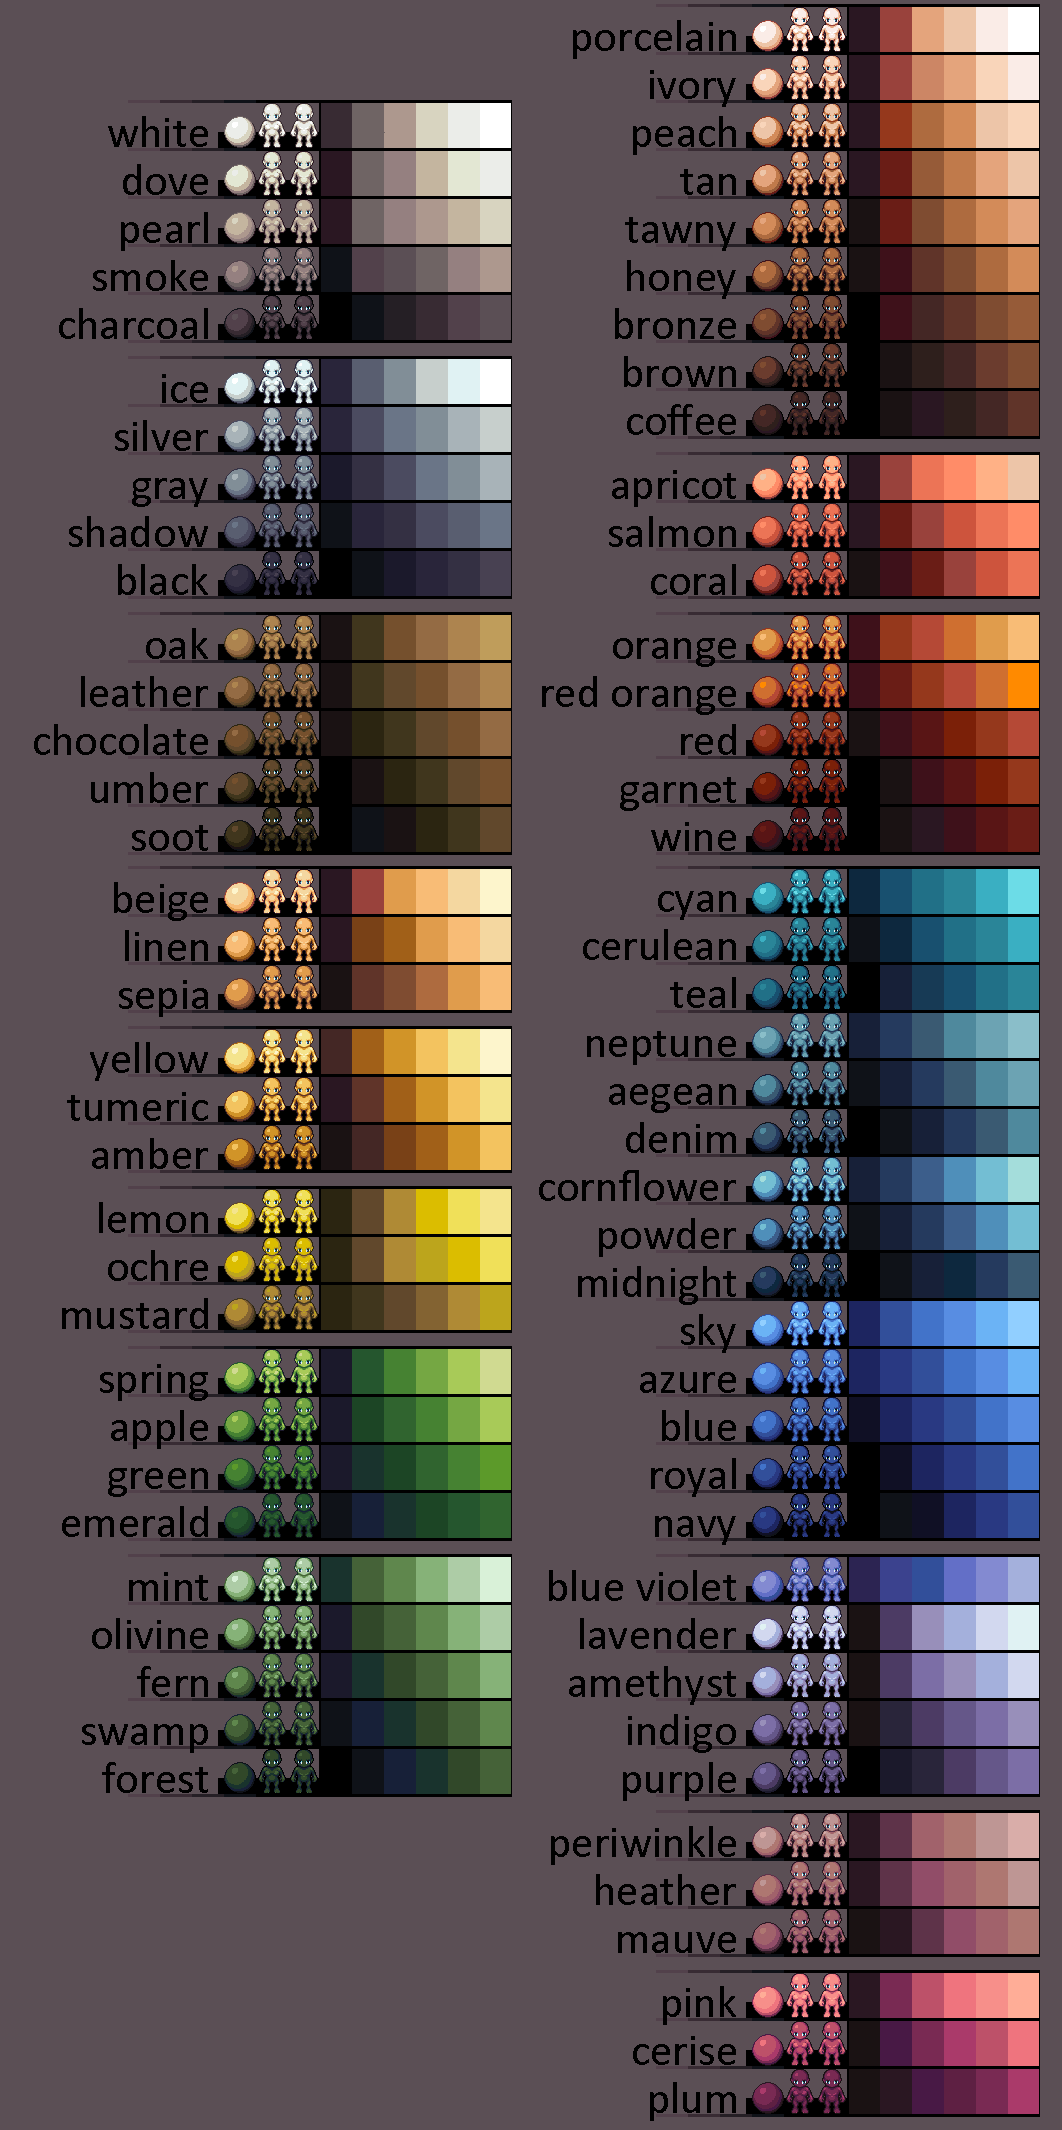
Grid Size
The general tile grid is 32x32 with (possible) sub tiles at 16x16. The rationale being that the basic size of a square object (eg a chair or a character) is a 32x32 area. All base assets are designed to work at 32x32 tiling, and it’s recommended that you build yours to be so as well. However, for versatility tiling can happen at 16x16 resolution.
Perspective
The camera angle is top-down, roughly 60 degrees.
Rendering should be orthographic, which means there is no perspective... things do not get smaller as they move into the distance. If you’re using perspective techniques on your props or tiles, that’s wrong.

Lighting, colors, and shading
Roughly a “toon style rendering” with medium-low levels of texturing. We want some detail, but not so much that things are so ornate that it might make collaboration difficult. We don’t want things to be “noisy” either. But detail is good. Texturing should have a toon-style; this is accomplished with medium to low amounts of texturing. Details should be used sparsely, so make them count!
Shade in blocks. Begin drawing by blocking out the object first, paying attention to its volume. Lines should be added afterward, and generally only around the edges and with very important details. Details should mostly be implied by form and color, not by outlines.
Lighting should primarily come from above. If there is any side directionality, it should come from the left, but not by much: keep it mostly center.
Dithering should be used sparingly if at all.
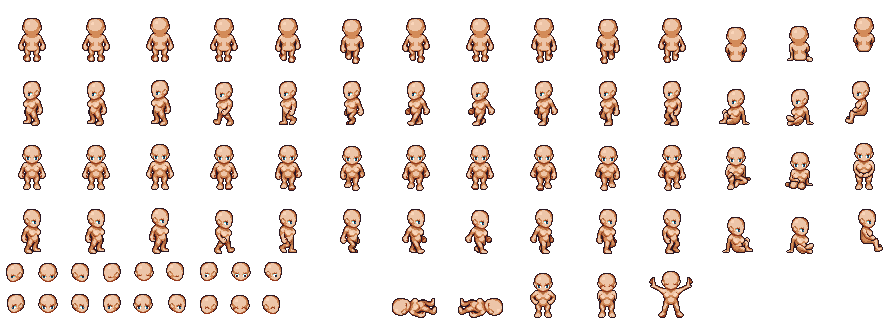
Standard Avatars
Standard sizes avatars have 64 x 64 frame spaces for each pose. You can use the below as guides.
Blank frames
![]()
Labeled frames
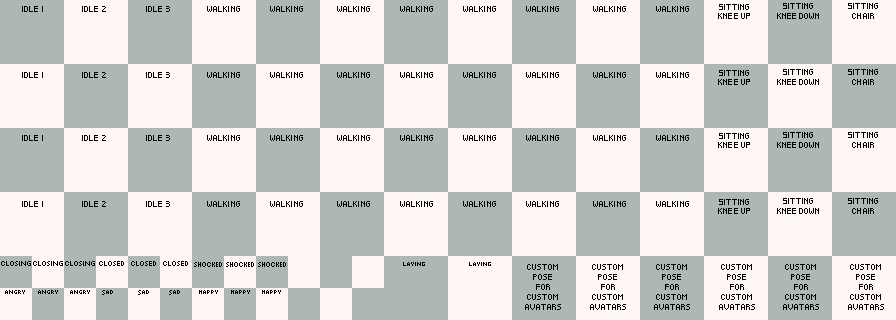
If you are making a fully custom avatar, you can use the extra spaces for custom poses. Here's an example that includes hands on hips, hands behind back, and a "casting" position.