Jane's tips on advanced profile prettification
One of the goals of the RP Repository is to provide great looking character profiles to everyone, even if they don't know a drop of coding. Yes, good ol' drag and drop has been the name of the game around here for nearly 3 years. Easy peasy!But recently, there's been a movement amongst a small group of members to put the "advanced" back into profile making. These intrepid designers have been taking advantage of every option offered to basic users, to take default templates and make them look amazingly custom.
 This is one of the many profiles that Jane has customized. Notice the use of unusual fonts -- she's about to teach us how to do that on our own profiles!
We're very lucky that Jane, one of the ringleaders of this movement, has agreed to share some of her secrets for fancifying profiles! She wrote three tutorials for us that were published in the news, and now preserved below for your prettification pleasure!
Jane's tips on fancy titles (new fonts/colors)
Every template for character pages has a certain title font that is easy to read and suits the profile.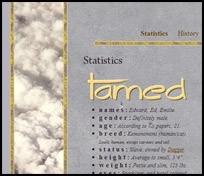 An example of a custom font in use on a free template. This profile belongs to Tamed (played by EdtheNeko)
You could try using the “font” tag, but this is likely to only work for you. Why? Because web pages can usually only display fonts that are installed on the viewer's computer. So you will see the fancy font you just downloaded, but no one else will unless they happen to have downloaded and installed the same one.
But you can ensure everyone sees the beautiful font you want by using an image instead of typed-in text. Just use your favorite image editing program to make a picture of the text in the font you want to use, and implement it with BBCode.
Code:
[img]your picture url here[/img]
If you want to align the picture, which can be helpful it you want to have the picture on one side of the profile, and maybe some typed text on the other, you can use BBCode like this:
Code:
[img align=left]your picture url here[/img]
 Here we see a custom font image being displayed with BBCode, with another image aligned to its left. This profile belongs to Anya (played by Twilit)
Instead of left, you can use right as well. Or, put it in center tags to center it:
Code:
[center][img]your picture url here[/img][center]
Creating the fancy title image
What you need:
- an image editing program (ie. GIMP) to make your picture (download for free here).
- a font you enjoy that suits your site (find some free fonts here).
- colors for your header that go well with your profile.
I personally prefer photobucket, because it is easy to use and you have much space.
At first, please download GIMP (or if you already have a program, feel free to use your own.)
When you have decided on a font (or several ones) that would suit your character, we can start.
Installing new fonts
Q: How do I install a font?
A: You download the font, and copy & paste the (.ttf)-file into your windows font-folder.
If you restart GIMP, the new fonts are accessible and you can use them without a problem. It can be helpful, if you write down the names of the fonts (if you have to many) so its easier to find them later.
Picking out a color
For the colors you want to use for your header, you can pick any color you want.
The code for the many different colors can be found here.
 I would recommend you use a color that is already used in the template. (ie. use the pipette-tool to pick up a color from a screenshot you took of your profile.)
 Once you have sampled the color that you would like to use for your text, you can find its hex code by clicking the sample swatch of it in the tool menu. It will open a window that has a section in it labeled "hex code." That is the information you will need to use this color.
Tip: You can make your normal text in a different color too, using the hex-name of the color and some BBCode.
Code:
[color=#ffc74c]insert text here.[/color]
Step-by-step image instructions (for GIMP)
- Open GIMP, and then choose file > new
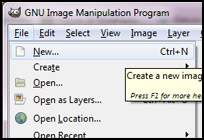
- Click More Options, and make sure the background color is set to transparent. Then click okay.

 Use the button with the big A and then click and drag a square on the transparent background of the canvas.
- That is where you will input your text. Just pick the font and the color and type.
 Use the rectangular selection tool to draw another box around your text. Then go to the Image menu, and choose crop to selection.
You might want to try to cut your “image-font” out as close as you can so it is easier to align later.- Save the image as a .png (This will allow you to use the transparent background)
- Upload the image to somewhere like photobucket, and then use the BBCode above to add it to your character profile.
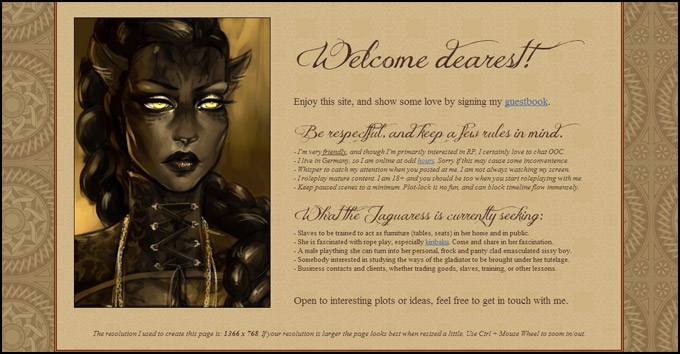
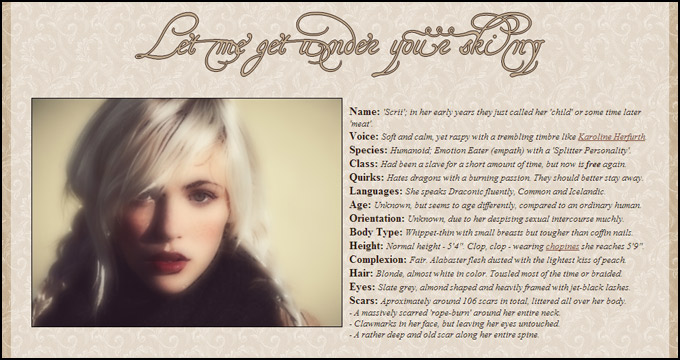 Another example of title fonts put to good use. This profile belongs to Scrii (played anonymously)
And there you have it! Jane's tips on how to create strikingly fancy, grungy, or moody titles for your character profiles.
Jane's tips on fancy pictures
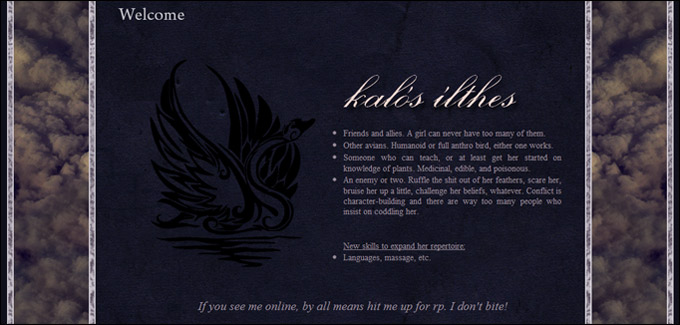
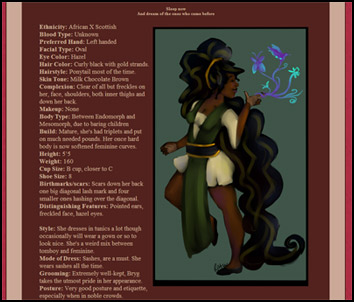 Bryg (played by KrypticRaven) makes phenomenal use of images throughout her profile, from simple character portraits, to a full illustrated menu of food she sells!
Basic code review
Let's review the basic code. This is the simplest way to add an image on your site:
Code:
[img]your picture url here[/img]
If you want to align the picture, which can be helpful if you want to have the picture
on one side, and let's say some text on the other:
Code:
[img align=left]your picture url here[/img]
Instead of left, you can also use right. And finally, you can center the image like this:
Code:
[center][img]your picture url here[/img][/center]
As I said last week, my favorite place to put images to link to is photobucket.
Using pictures as links
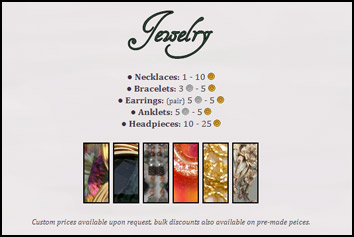
Freya Morris (played by iskait) created a custom gallery to show off all the pieces of jewelry the character wears. Each image links to a larger image. She's even used images of copper and silver coins to denote how much the character charges to craft different types of jewlery!
For example if you use a crop-out and want to link it to the original (big) picture.
You could use this little effect to show wares your character is currently selling, or even the clothes he/she wears without cluttering your profile. Or simply to make your site look not as boring.
Here is how to turn an image into a link:
Code:
[url=link here][img]url of the picture here[/img][/url]
Here is a version that you can play with, to see what I mean:

 An example of cropped out images, linking to the fullsize versions. What an awesome way to show off your character's wardrobe!
As you can see, just using pictures on your RPR gives you so many wonderful possibilities to prettify your site. If you do not have any pictures, and no money to commission them, there are a few artists that are wiling to draw your character for free. Check out this forum. Of course, always be nice.
Creating images with transparent backgrounds
If you have a sketch (black/white) you can easily make it transparent with GIMP. See the first tutorial for instructions on obtaining a free copy of GIMP.
When commissioning artwork, I mostly ask for a transparent background. If the artist does know about it before he/she starts, its not much hassle. Requesting it afterward could be tricky.
If you already have a black and white image, making it transparent is very easy.
Open the sketch in GIMP, and open the menu “Colors” and then click “Color to alpha”. If you try it on colored pictures you will see, that it works as well but bleaches your picture or even worse. But a try never hurts, if you do not save it.
Cropping and framing images in shapes other than squares
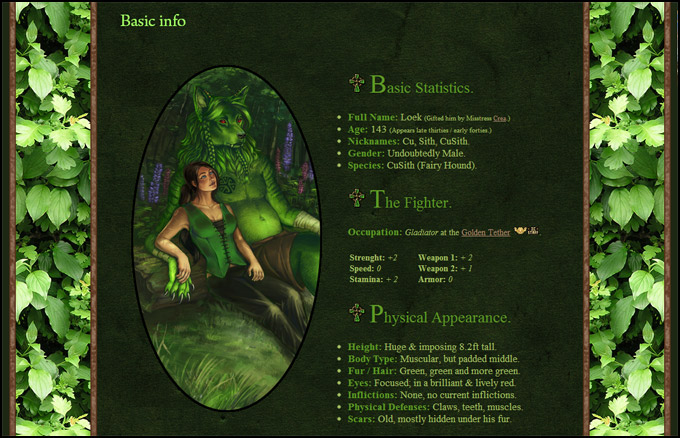 Cusith (played by GreenCinders)'s profile is decorated with an image that has been cropped into an oval, and framed with a dark brown border.
Note: Framing cube shaped pictures is easier than rounded ones. But it is not impossible.
When I made my own profile, I used a complicated method to frame rounded crop-outs, until Eyadi, a friend of mine that is an artist, told me about a method that is easier. Gladly, she used GIMP as well.
I want to thank her for this tip.
- Open the picture you want to use for your crop-out in GIMP
 Use the ellipse select tool to select an oval you want.
- Copy it and then paste it into a new transparent image so you have the oval, separate.
 Use the magic color wand, and click into the picture with the oval.
- Go to the menu "Select" and choose "Invert", so just the oval is selected. Now in the same menu, choose "grow".
- Let the selection grow by 1 pixel or 3, it depends on what you want. This will help to remove ragged edges of color.
- Ctrl + X, and the oval is now a few pixels bigger, and empty.
- Fill it with a color, and press Ctrl + V and the cropout is in the middle of the colored frame.
- It should align itself, and now simply save it as a png, and say yes when it asks if you want to put the layers together.
- Upload the image to your favorite image site, such as photobucket, and place it onto your profile with the BBCode at the start of this article. You can wrap it in a link to the full, uncropped image as well!
And that's Jane's tips on making more creative use of all your character reference images.
How to make your profile look clean and neatly aligned
Saluda (played by Hooke) uses simple bolded text to create section titles, then makes use of the indent tag to create simple, clean, understandable-at-a-glance sections on his profile.
Your profile is already pretty, but you want that final touch to make it look very clean and orderly?
You might want to align the text as blocktext, meaning all your sentences will extend to both sides of the page, using this:
Code:
[justify] text goes here [/justify]
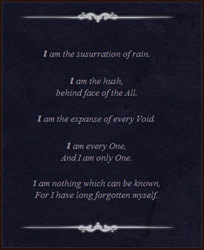
The Vessel (played by Hooke) uses a combination of centered text, italics, and bolded first letters of each line to create a poetic introduction. Plus, check out the use of images as tasteful dividers!
Don't use the same size for your text on your whole site.
This looks plain and makes it hard to read. Some important points or words should be emphasized to lead the eye through the profile. Less important information can be made smaller so people can read it if they want, or skip it if they are looking for the main points.
The code for changing the size of your text is:
Code:
[size=2] text goes here [/size]
You can use numbers 1 through 7 when picking your size.
BBcode gives you many possibilities you can use to your advantage to make text stand out.
Code:
[b] text goes here [/b] = bold
[i] text goes here [/i] = italics
[u] text goes here [/u] = underlined
[s] text goes here [/s] = strike out
The text on your profile sticks to the top/bottom, no matter what you do?
"White space" or blank characters like enter or lots of spaces are trimmed off the beginning and end of text widgets when they are saved. If you want a way around this, insert some BBCode and do not put any text inside it, just hit enter a few times. Then this "White space" will not be at the beginning of your text, so it will not be trimmed off when you hit save.
Code:
[b][/b]
I did not put anything inside the bold tag, so nothing will appear on my profile.
But the new lines above this sentence will be preserved.
Removing the default titles from widgets
I personally use a single text-widget for my sites. However if it confuses you, you can use more.
You don't have to put text into the widget's title box. Leave it blank if you think it doesn't go well with your layout.
A neat way to organize the statistics of a char is to use columns.
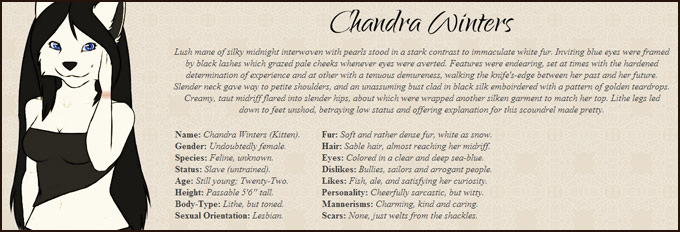
Chandra Winters (played anonymously) uses columns to organize some basic information about herself into two sections on the same line, making efficient and pleasant use of visual space.
You can find the code for the columns here.
You can use other Bbcodes in the columns too, for example the collapse tag.
You will find out that the size of the columns depends on the text. This can make the columns look cluttered, because they aren't aligned the way you want them.
A solution is to create a transparent picture of a certain size.
The picture has to be just a pixel in height, and for example 250 pixels wide.
If you add that picture in the first line of every column, they will all have the same size.
Different screen resolutions
If your profile looks all pretty but another user points out that some of the alignments you made are not working, it could always be that the other user is using a different resolution to view sites.
Use Ctrl + Mouse Wheel to zoom in/out, to see how the page would look in different resolutions.
Just do your best to make it look good, but if you are worried, you can include a note that informs people that they may need to try a different resolution to see your best work.
Want more ideas for content?
Check out this article on great information to include on a character profile.
Comments
Novus

May 16, 2020
8:12pm
I didn't even think about using images in place of CSS. This is great!! Thank you for sharing.

Thank you for posting this! This is very insightful for the CSS-challenged types like me!
Rogue-Scribe
May 16, 2020
4:46am
This was quite informative!
Masquerade
January 1, 2023
12:17pm